Date: 08 Apr 2024
When you are at sea one of the things to watch out for is to avoid capsizing the kayak.
The first rule is to always use high-end kayaks from proven manufacturers, designed for high stability and sized for your build.
These are usually touring kayaks over 4 metres in length and over 60 cm in width.
However, the qualities of the boat are not the only important factor. Keeping your balance and being able to recover lost balance are another component to a good experience on the water.
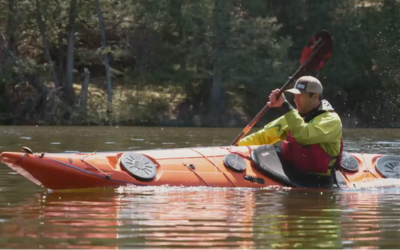
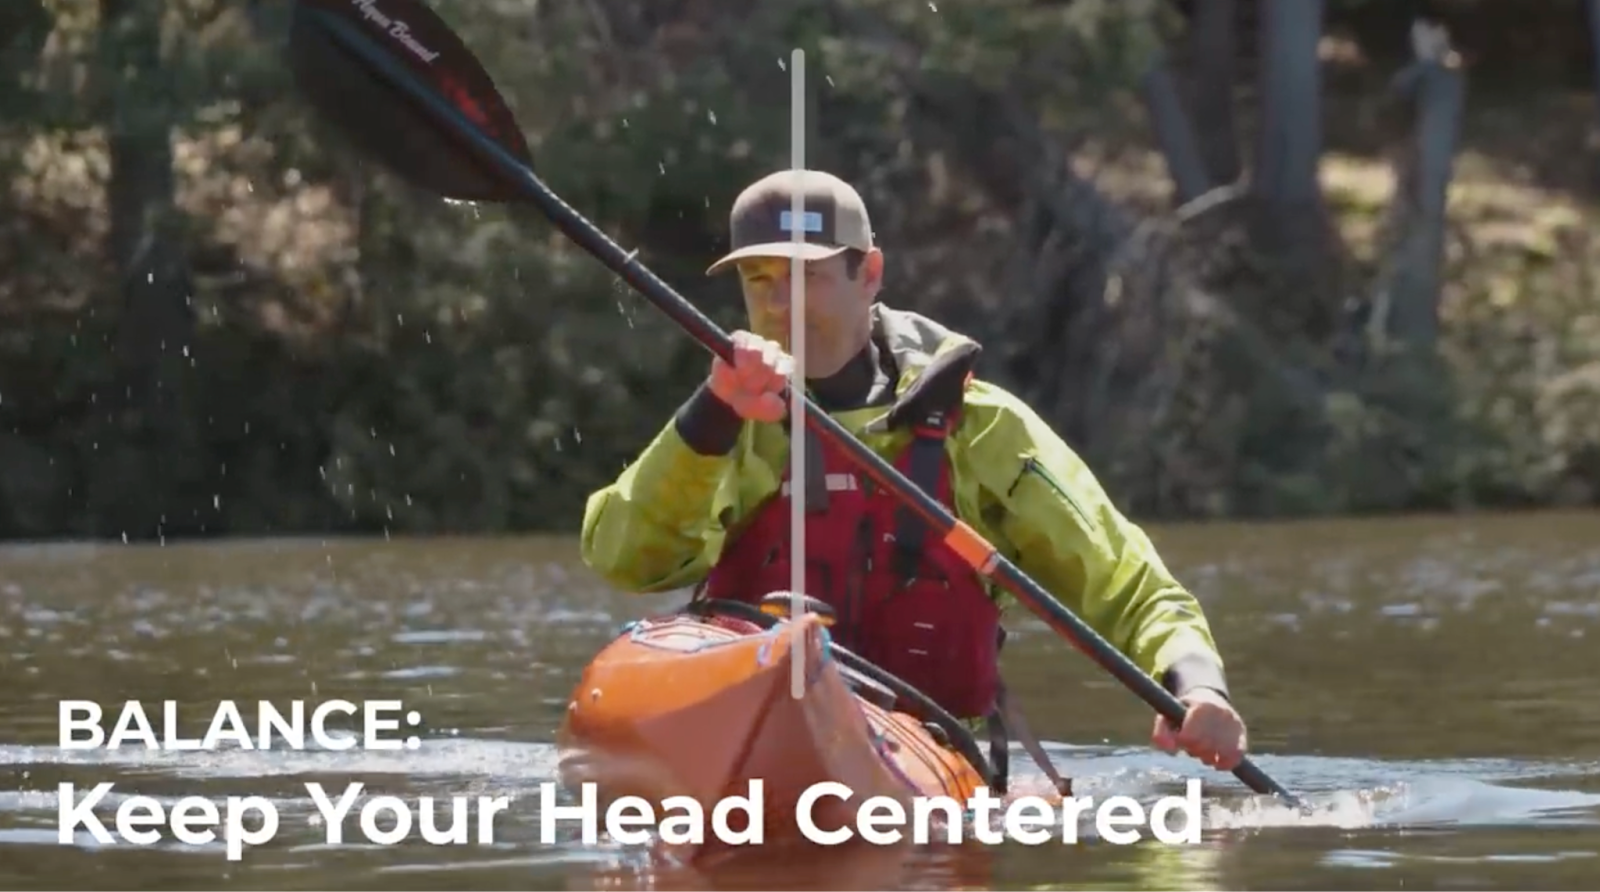
- One of the basic rules for keeping your balance is to always strive to keep your head centered over the kayak, regardless of the boat's pitch:
The hips should control the kayak, and the arms should paddle.
Aim for the lower and upper body to work independently but in cooperation with each other.
If you lose your balance or are hit by a wave you will need support to prevent tipping over as there are several options:
1. Restoring balance using lateral pressure
Place the paddle blade on the surface of the water, on the side of the kayak, and push hard. When you push down on the paddle blade, it starts to sink. This provides good support until it sinks more than 30 inches below the surface. If you let the paddle sink 60 cm or more, you will have very little support.
Timing is important, this operation is effective in the first second, so you must make full use of the little time you have. Simultaneously with the pressure on the scapula, the hips should push the boat in the opposite direction.
A distinction must be made between lateral pressure to maintain balance and a stroke with the paddle to regain balance and use it to return to an upright position.
2. Restoring balance using a side stroke with the paddle - general
This involves stopping the reversing momentum by hitting the water sideways with the paddle as soon as you lose your balance. This momentary support you get from the paddle will allow you to flip the kayak with your hips upright again and elevate your body off the top. It is important to note that this technique works much better when you are in a kayak that is suitable for you and has stable hip support.


There are two types of paddle strokes in the water that you can use.
- A low stroke when the paddle is below our elbows and a high stroke when the paddle is above them.
Of course, these skills need to be developed and practiced in the water.
3. Supporting blow "low recovery"
It is easiest to learn how to do recovery strokes close to shore in waist-deep water with a helper standing next to you. If you are going to perform the stroke on your right side, have your helper stand on your left just behind your body. The helper firmly grips the edge of the cockpit with one hand behind you and one in front. You must be careful because you may tip over despite your helper's efforts.

Low stroke recovery instructions to the right:
3.1. Sit upright, holding your paddle in the rowing position. Sample instructions are for a right-handed paddle. So, raise one elbow and rotate your right wrist until the right paddle blade is horizontal.
3.2. Reach to the right with your paddle. Do not fully straighten your right elbow. For the first attempt, keep it bent at 90 degrees. For a low support stroke for recovery, your right elbow should be higher than the paddle lever. Your paddle should be as horizontal as possible and at right angles to the kayak. Place the back of the paddle on the water. Tilt your body towards it a little and suddenly push down hard ("stroke"). As you stroke, keep your head and body where they are and use your hips to bring the kayak back upright. A split second later, when the kayak is upright, you can straighten your body as well.
3.3. To raise the paddle blade back to the surface, turn the blade vertically, it will easily go up through the water. Once you have made your first support stroke, try again, with variations until you have mastered the technique, and then try tilting the kayak, your body and head a little more to the right before striking, and try varying the force with which you strike. You shouldn't smash the paddle blade on the surface with noise and splash, but your stroke should be fast and hard so that the blade doesn't sink any more than necessary.
The more you bend, the farther you have to stretch so the bar is long and you can get back upright again.
When you master the low recovery stroke on the right, start practicing it on the left as well.
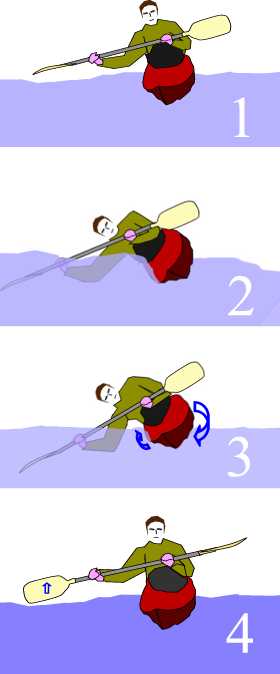
4. Supporting blow "high recovery"
It's the same as a low recovery, except you bend even more, your elbow is lower than the paddle, and the scooping side of the paddle blade is pointing down.
This stroke requires a good snap of the hips. Note that in Drawing 3 below, the kayak is almost upright again, but the kayaker's head and body are still quite sideways.
It is quicker and easier if a helper stands next to the kayak of the learner.
Instructions for high kick recovery on the right:
4.1. Sit upright, holding your paddle in the rowing position. Raise the paddle by bending your elbows until the paddle stands horizontally, about 20 cm in front of your chest, and rotate your wrists back if necessary so that the scooping side of your right shoulder blade points down. Lean your body and boat to the right, reach out to the right and place the paddle blade on the surface. Keep both hands low so that the blade on the water is as horizontal as possible.
4.2 Pull hard so that the paddle goes vertically down.
4.3. At the same time, use your hips and thighs to return the kayak to a horizontal position moments before you also stand up.
4.4. To remove the blade from the water, turn your paddle so that the blade stands vertically and then pull up.
With a little practice you should be able to put your right elbow in the water before you hit, then your right shoulder, then your right ear. A skilled kayaker can easily duck their head underwater before standing up again.
WARNING: It's tempting to take high recovery to extremes, throwing yourself from side to side and reaching out as far as you can. Everyone does it because they like it. But keep in mind that some people are vulnerable to dislocated shoulders. This is a fairly common injury among extreme kayakers. Performing a powerful high recovery stroke with your outside arm straight at the elbow can cause the shoulder to be pulled out of the ball.
Sources:
kayarchy.com
paddling.com


Post comment